

Sitemap Editor: Plan Your Website Structure Before You Design
Learn how to review, edit, and refine your website's page and section structure in the SproutOS Sitemap Editor before moving to the Design Editor.
Phase 1 of 3: You are here: Sitemap → Design → Export. The Sitemap Editor is where you review and refine the structure SproutOS generated from your prompt. Changes here feed directly into the Design Editor.
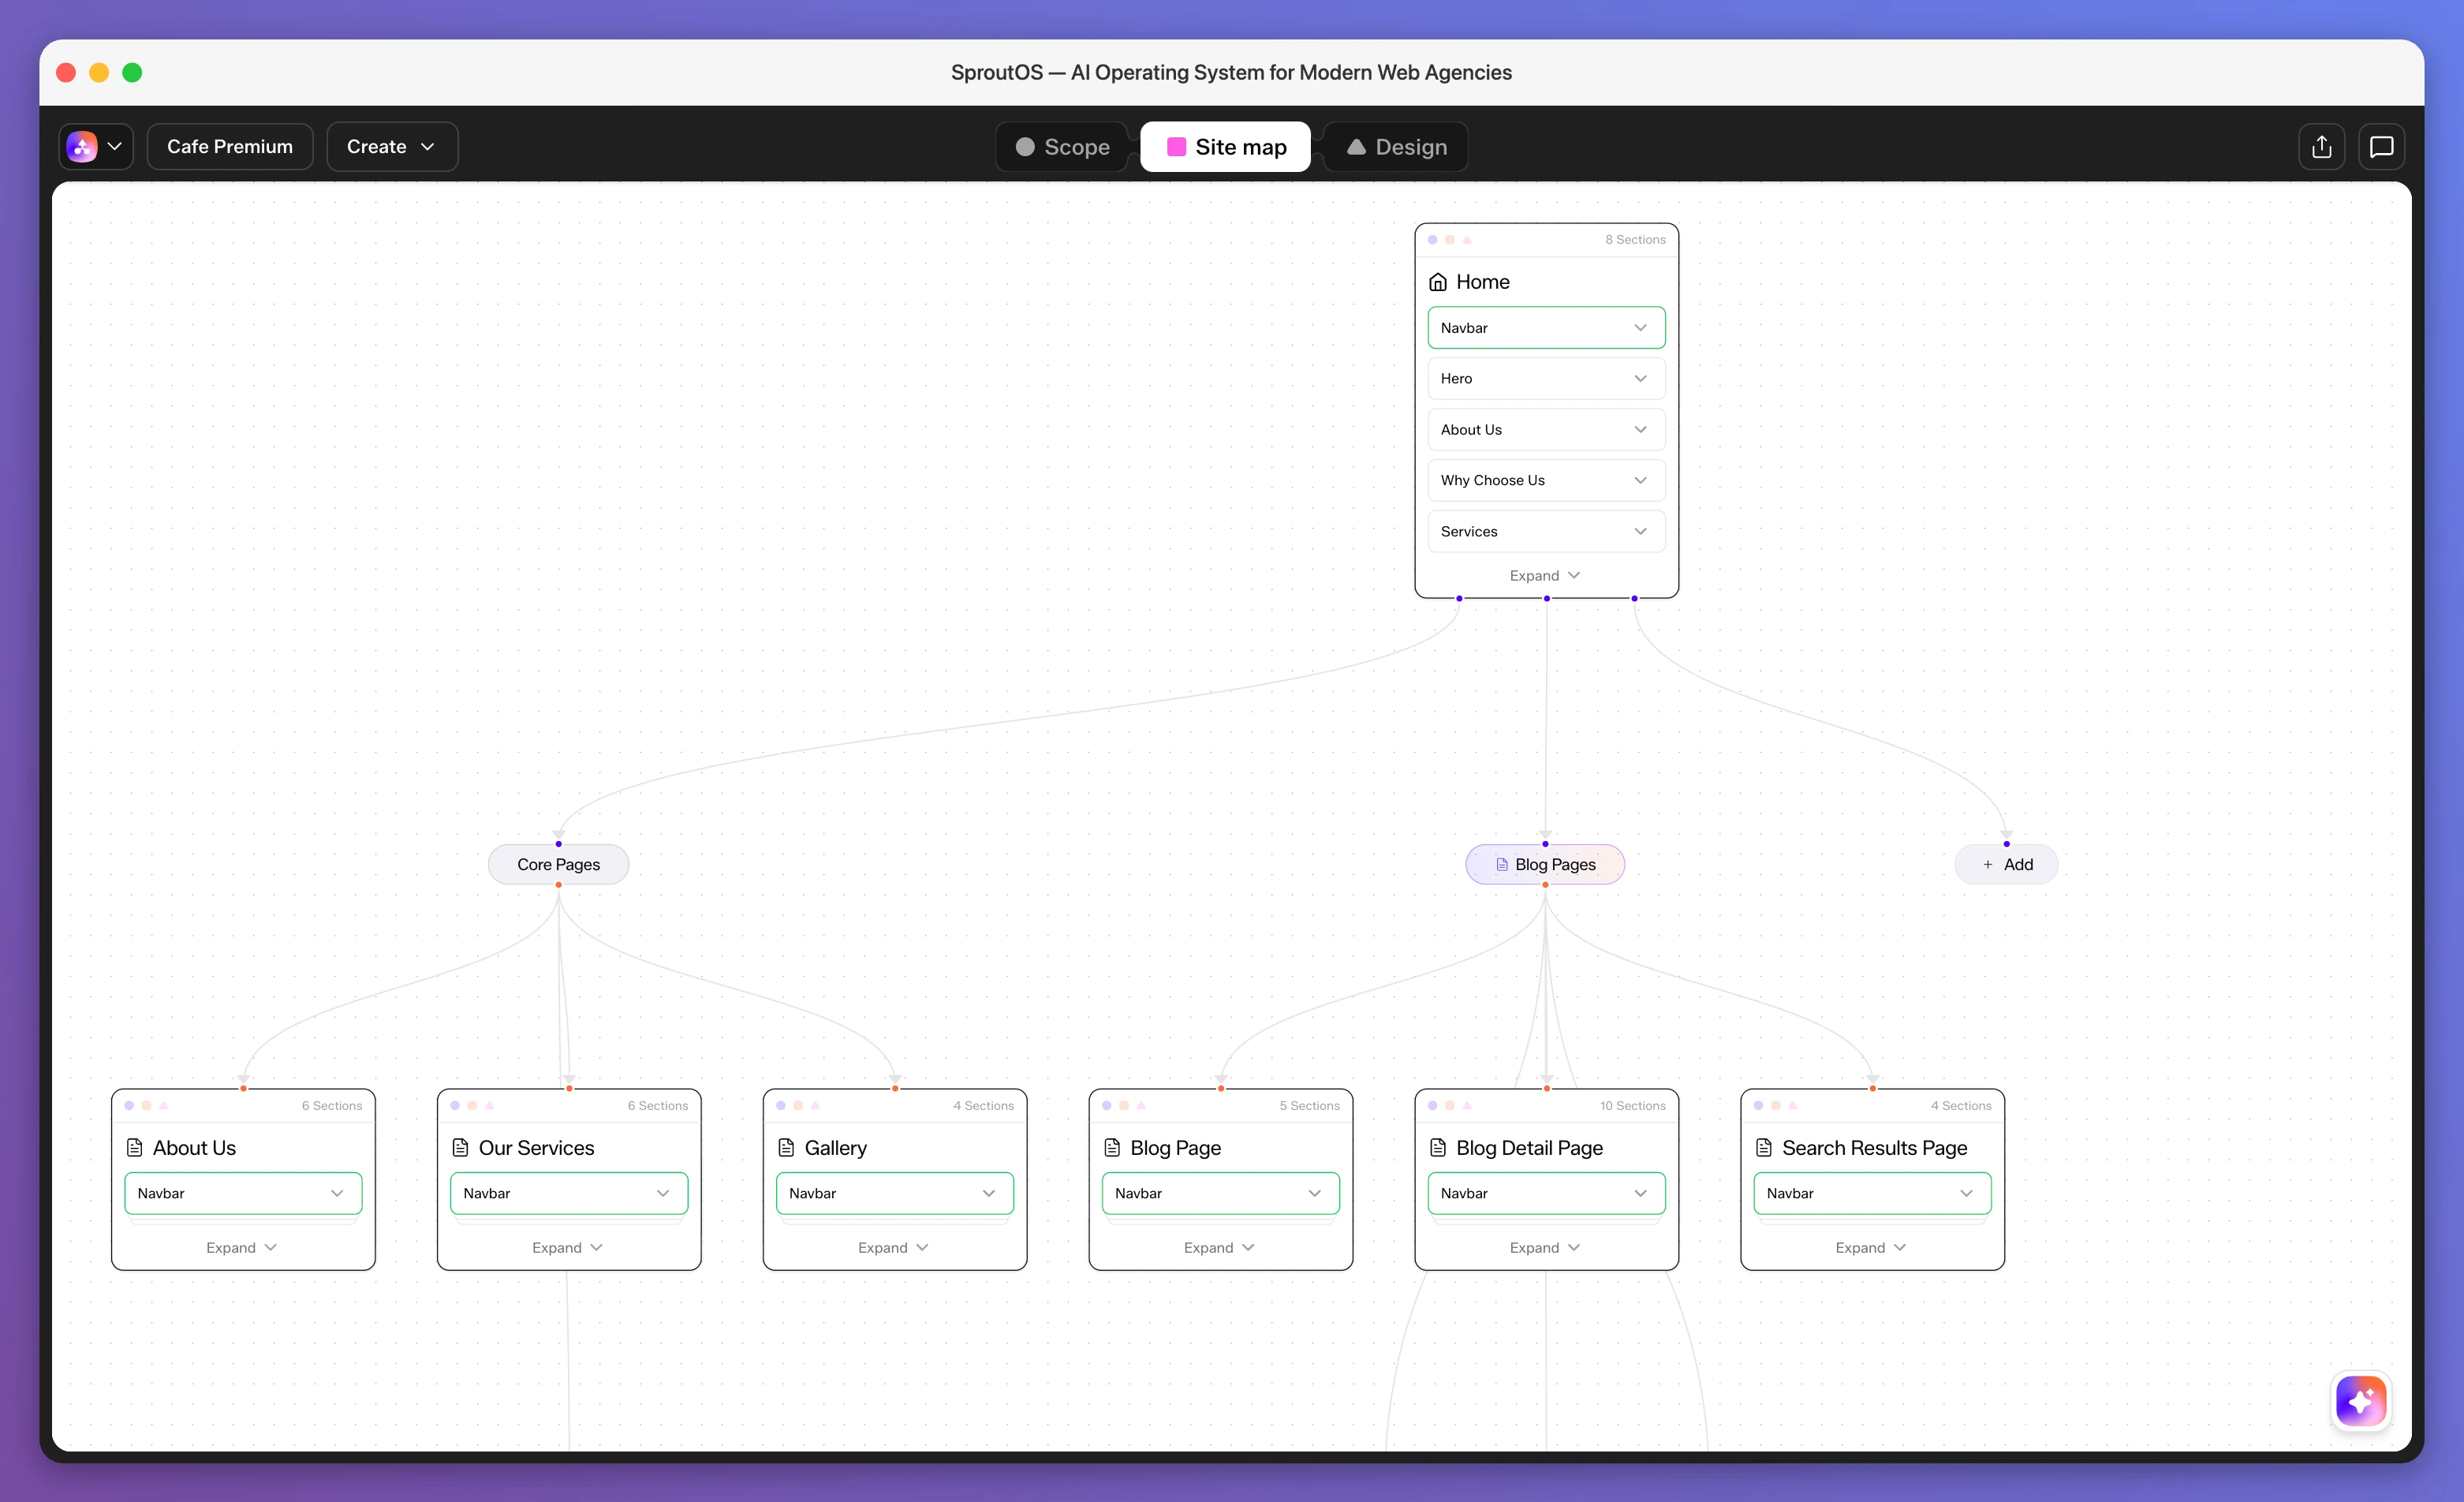
The Sitemap Editor is a visual canvas where you plan your website's pages and sections. When you enter a prompt, SproutOS generates your Core Pages automatically. You then review the structure, add more pages, edit sections, and finalize everything before moving to design.
Understanding the Canvas
When you land on the Sitemap canvas, you see your Core Pages displayed as page nodes. These are the pages SproutOS generated based on your brief (for example, Home, About, Services, Contact). Each page node lists the sections assigned to it.
From here, you can add new pages, edit section details, and add or remove sections.
Adding Pages
SproutOS generates your Core Pages from the brief. If you need additional pages, click the + Add button on the canvas. A popup opens with the following page category:
- Blog Pages: Blog index, post templates, category pages, and tag pages.
When you select a category, SproutOS generates the relevant pages and adds them to your canvas.
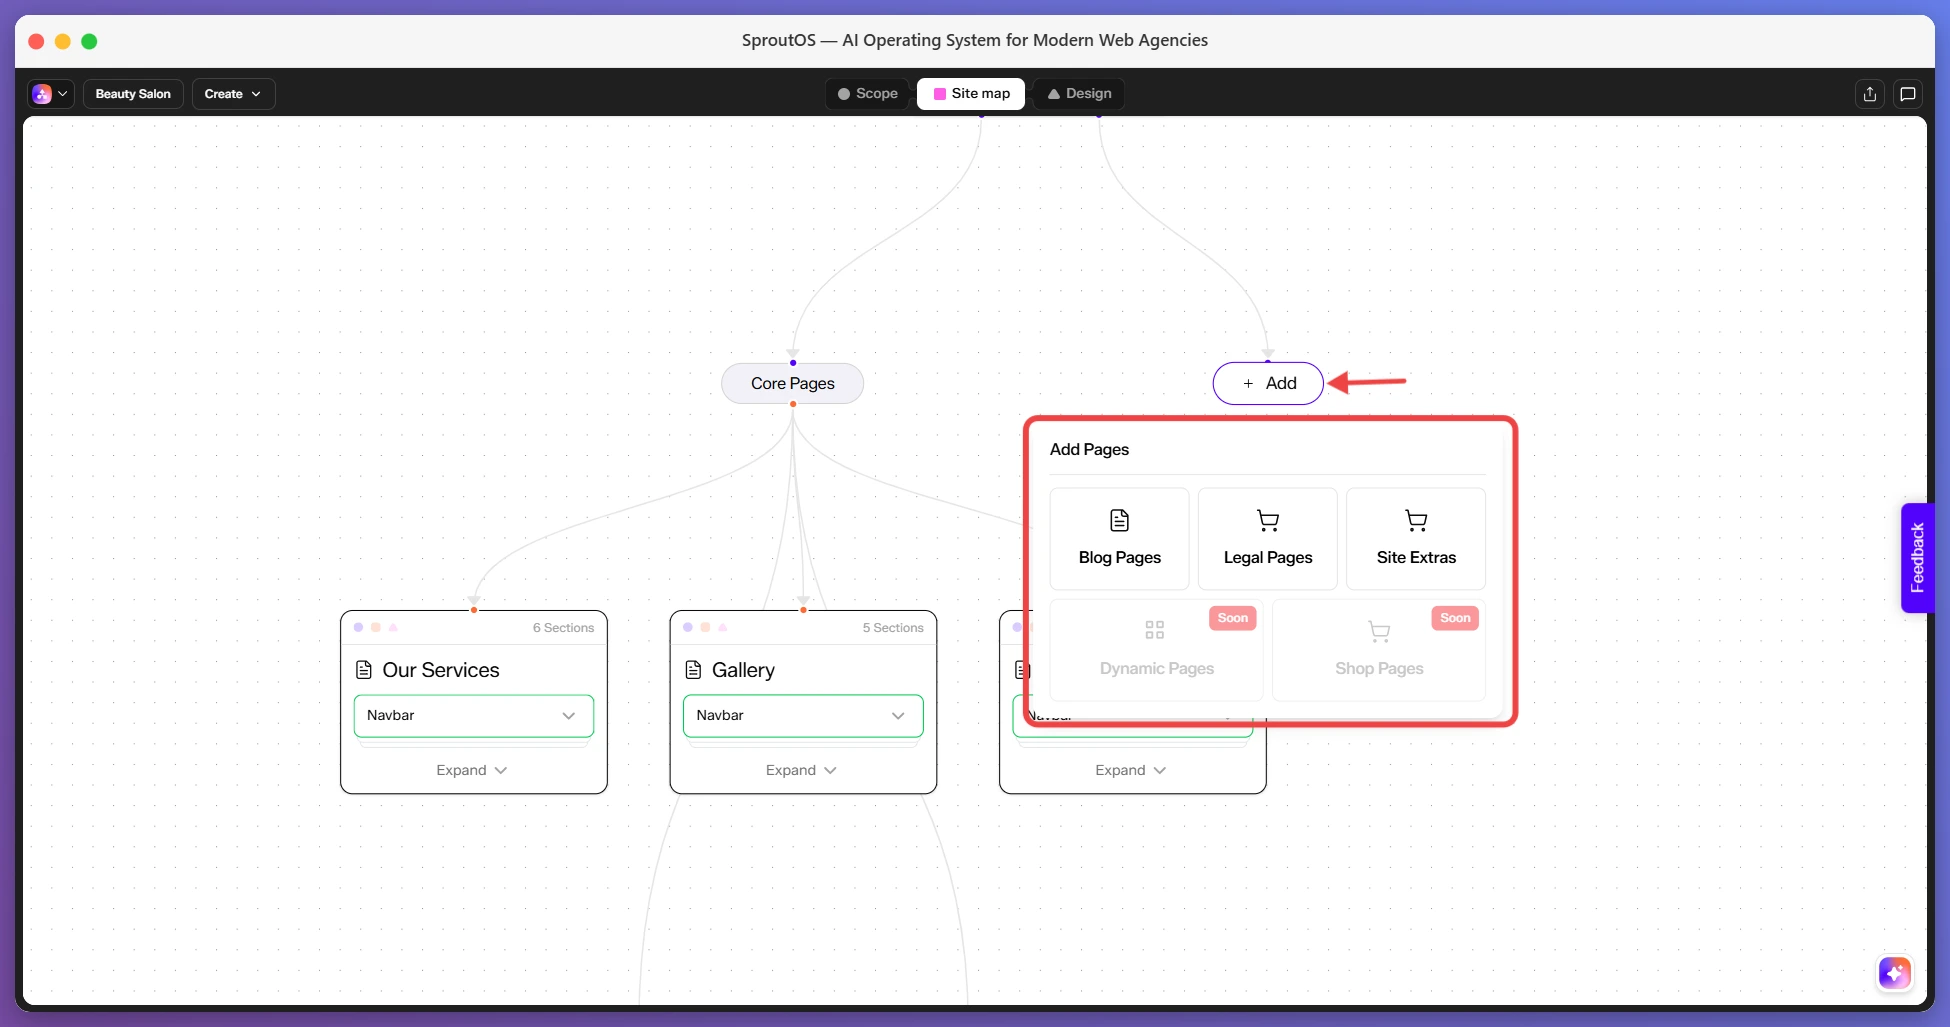
Legal Pages, Site Extras, Dynamic Pages, and Shop Pages are coming soon.
Managing Pages
Once your pages are on the canvas, you can rename or delete them.
- Rename a page: Double-click the page name on the node. Type the new name and it updates instantly.
- Delete a page: Click the three-dot menu beside the page name and select Delete. SproutOS removes the page and all its sections from the canvas.
Working with Sections
Sections are the building blocks inside each page. You can view their details, add new ones, or delete the ones you do not need.
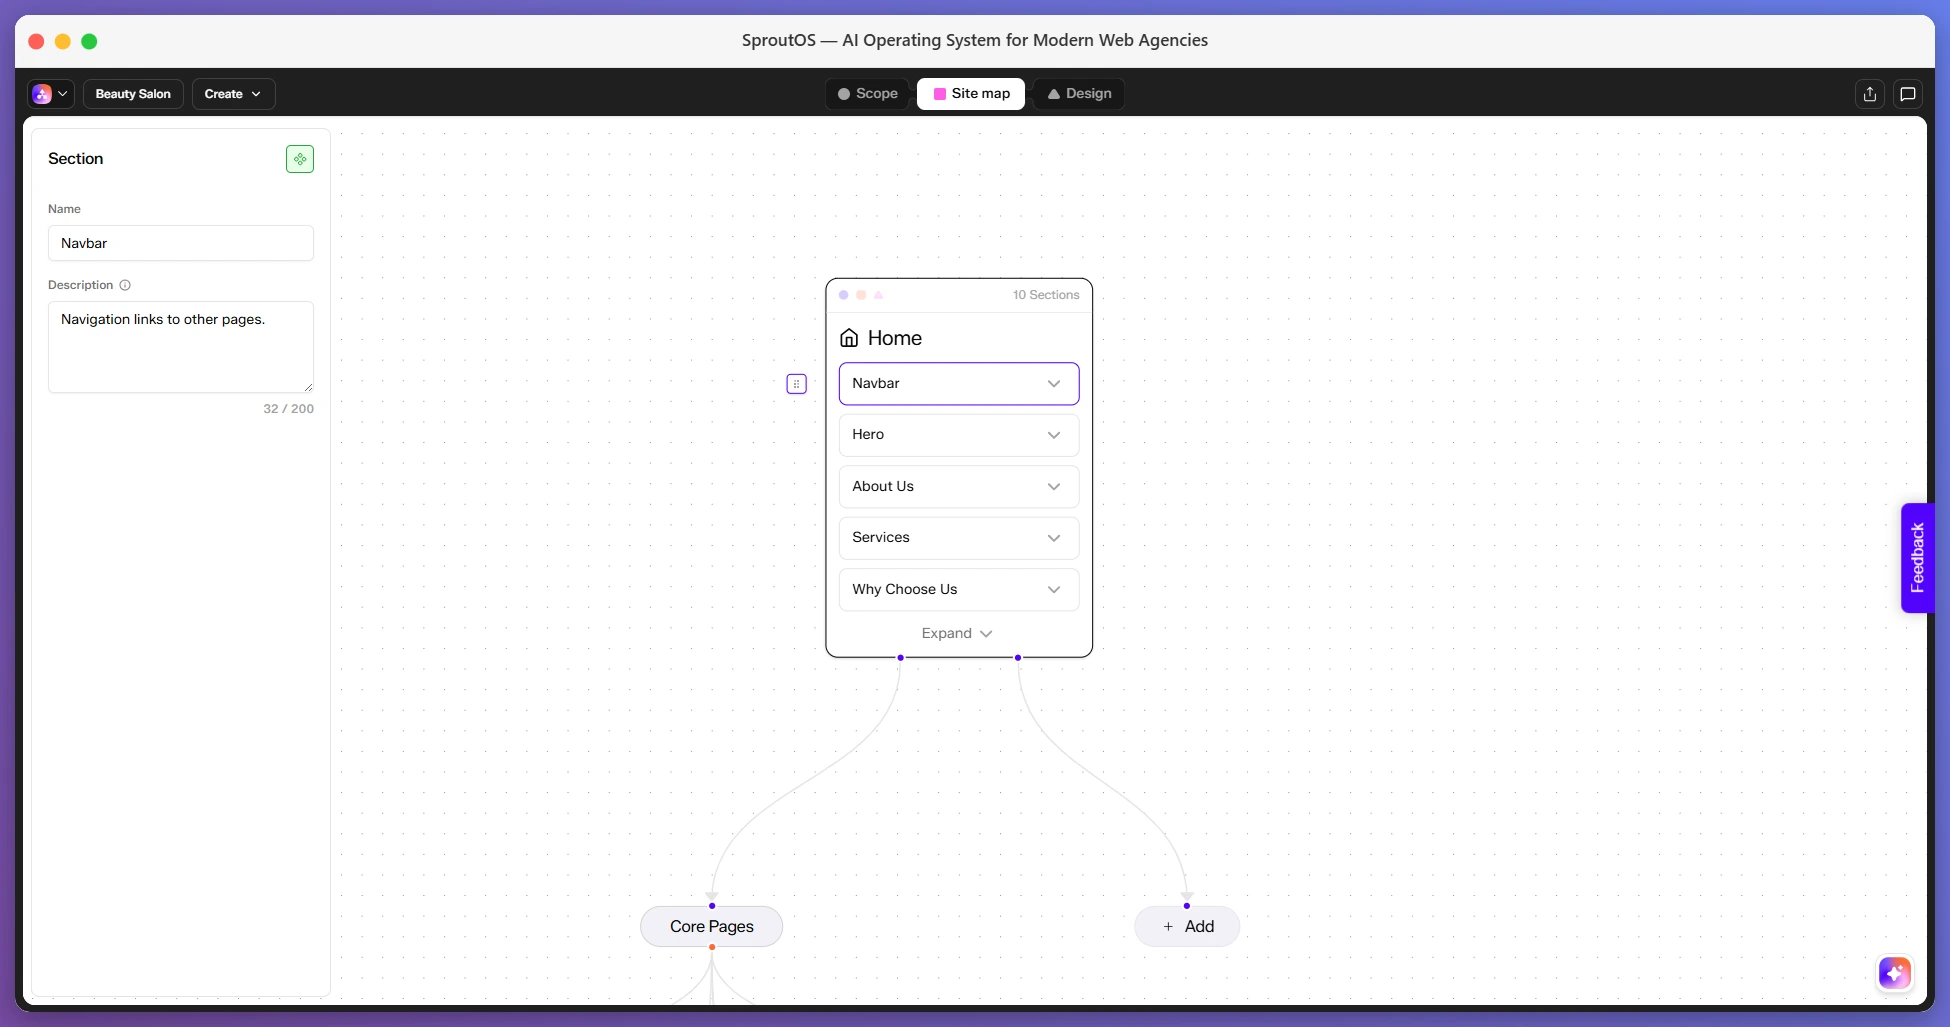
Viewing and Editing Section Details
Click any section on a page node. A side panel opens showing the section's Name and Description. You can edit the description to add notes for your own reference or for team collaboration. This does not affect the design output. It is purely for internal documentation.
Adding a Section
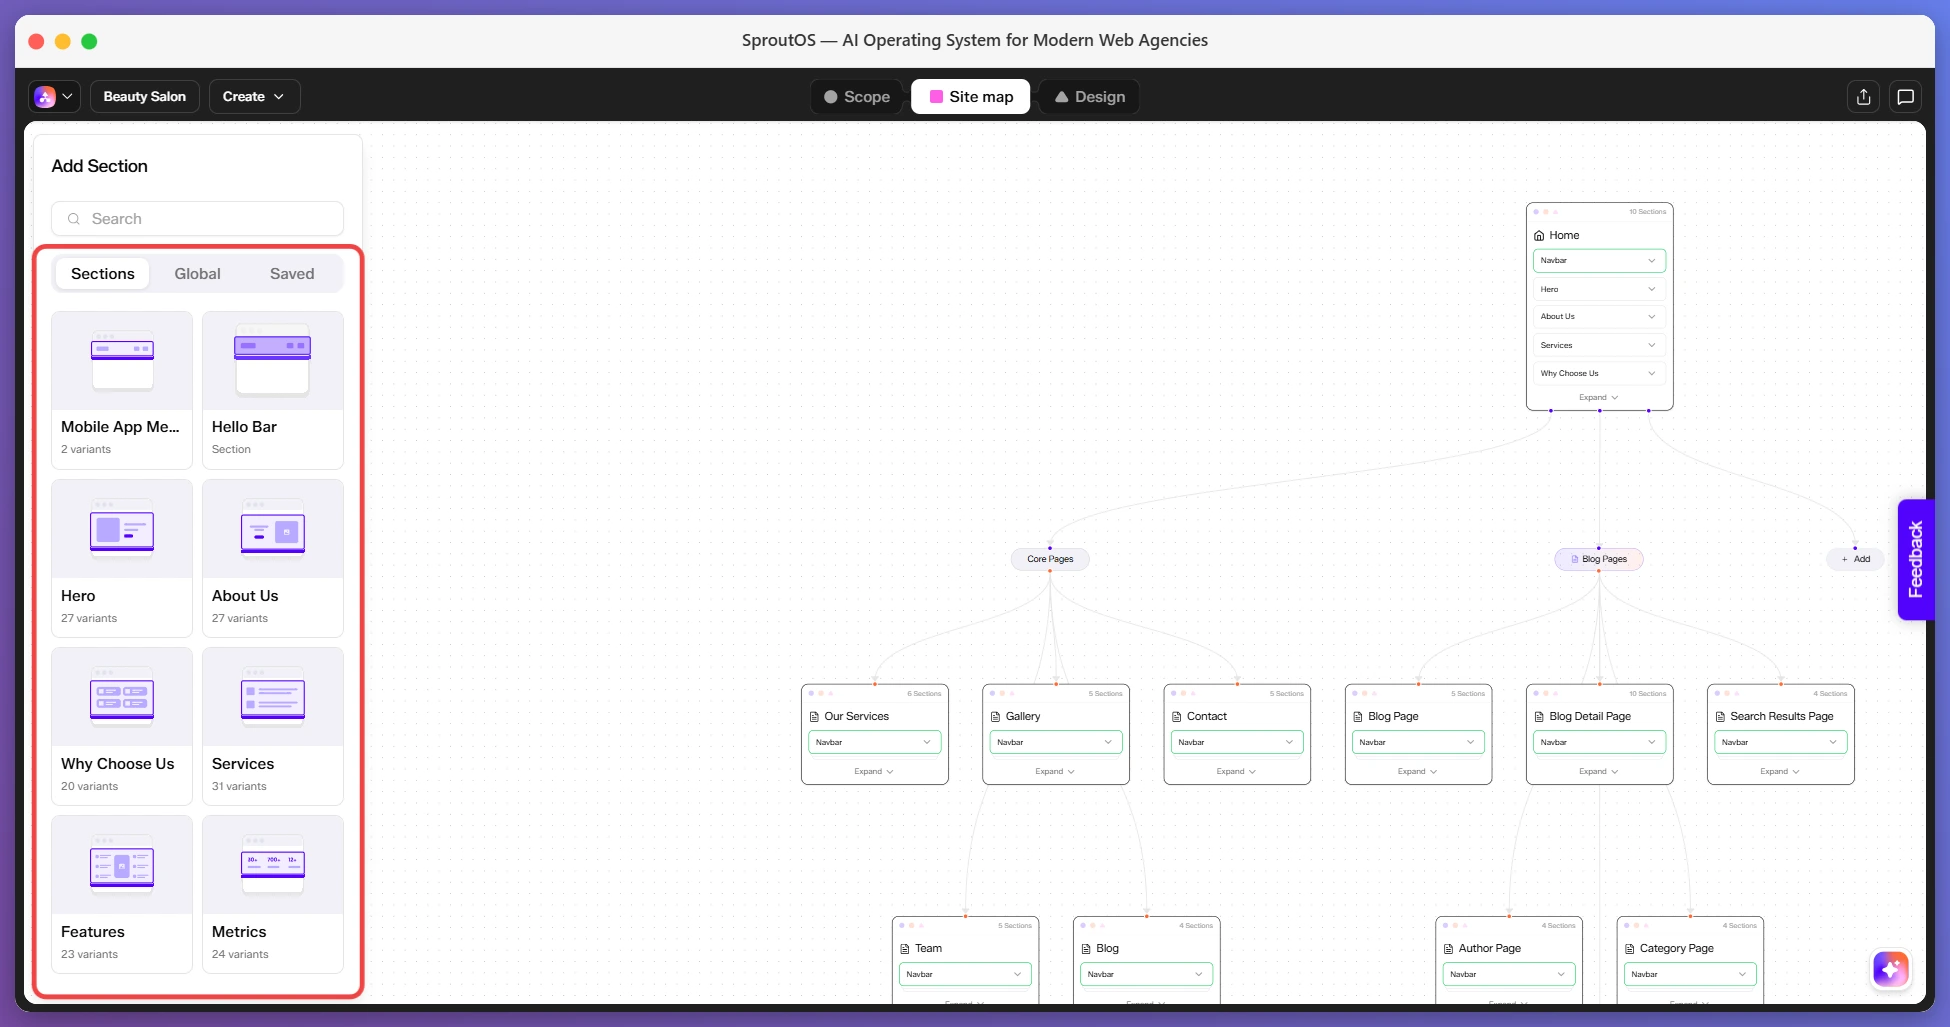
Hover between two existing sections on a page node. A plus (+) icon appears. Click it and a side panel opens with three tabs:
- Section Tab: Browse section categories like Hero, About Us, Services, Team, Gallery, Testimonials, and more. Each category contains multiple sections in different designs and styles. Click any section to add it at that position.
- Global Tab: View all your Global sections. These are sections shared across multiple pages (typically Navbar and Footer).
- Saved Tab: View all your previously saved sections. Use this to reuse sections you have customized before.
Deleting a Section
Right-click any section on a page node. A context menu appears with the option to delete it. The section is removed from that page immediately.
Section Categories
The Section tab in the add panel includes 51+ section types. Here are the most common categories:
| Category | Section Types |
|---|---|
| Navigation | Navbar, Mega Menu, Header |
| Content | Hero, About Us, Services, Features, Metrics |
| Social Proof | Testimonials, Company Logos, Portfolio, Gallery |
| Conversion | CTA, Contact Form, Pricing Table |
| Information | FAQ, Blog, Team, Location |
| Structure | Footer |
Frequently Asked Questions
Adding or removing sections updates your design automatically. Existing design customizations on unchanged sections are preserved.
Global sections are shared across all pages. Typically these are your Navbar and Footer. Editing a global section in the Design Editor updates it everywhere at once.
No. You can only use section types available in the library.
Next Step

Design Editor
Customize the visual look of every page and section in the Design Editor.