

Scope Editor: Turn Your Prompt Into a Structured Project Brief
Learn how to review your AI-generated project draft in the SproutOS Scope Editor. Start from a blank prompt, an existing website, or an uploaded brief, then confirm or edit six sections covering your business, brand direction, and references before SproutOS builds your sitemap.
Phase 1 of 4: You are here: Scope → Sitemap → Design → Export. The Scope Editor is where you review the project draft SproutOS generated from your prompt before it builds your sitemap.
The more specific your answers, the more the final design actually fits your client instead of reading like a template. Nothing is locked in until you confirm it.
Reviewing Your Draft
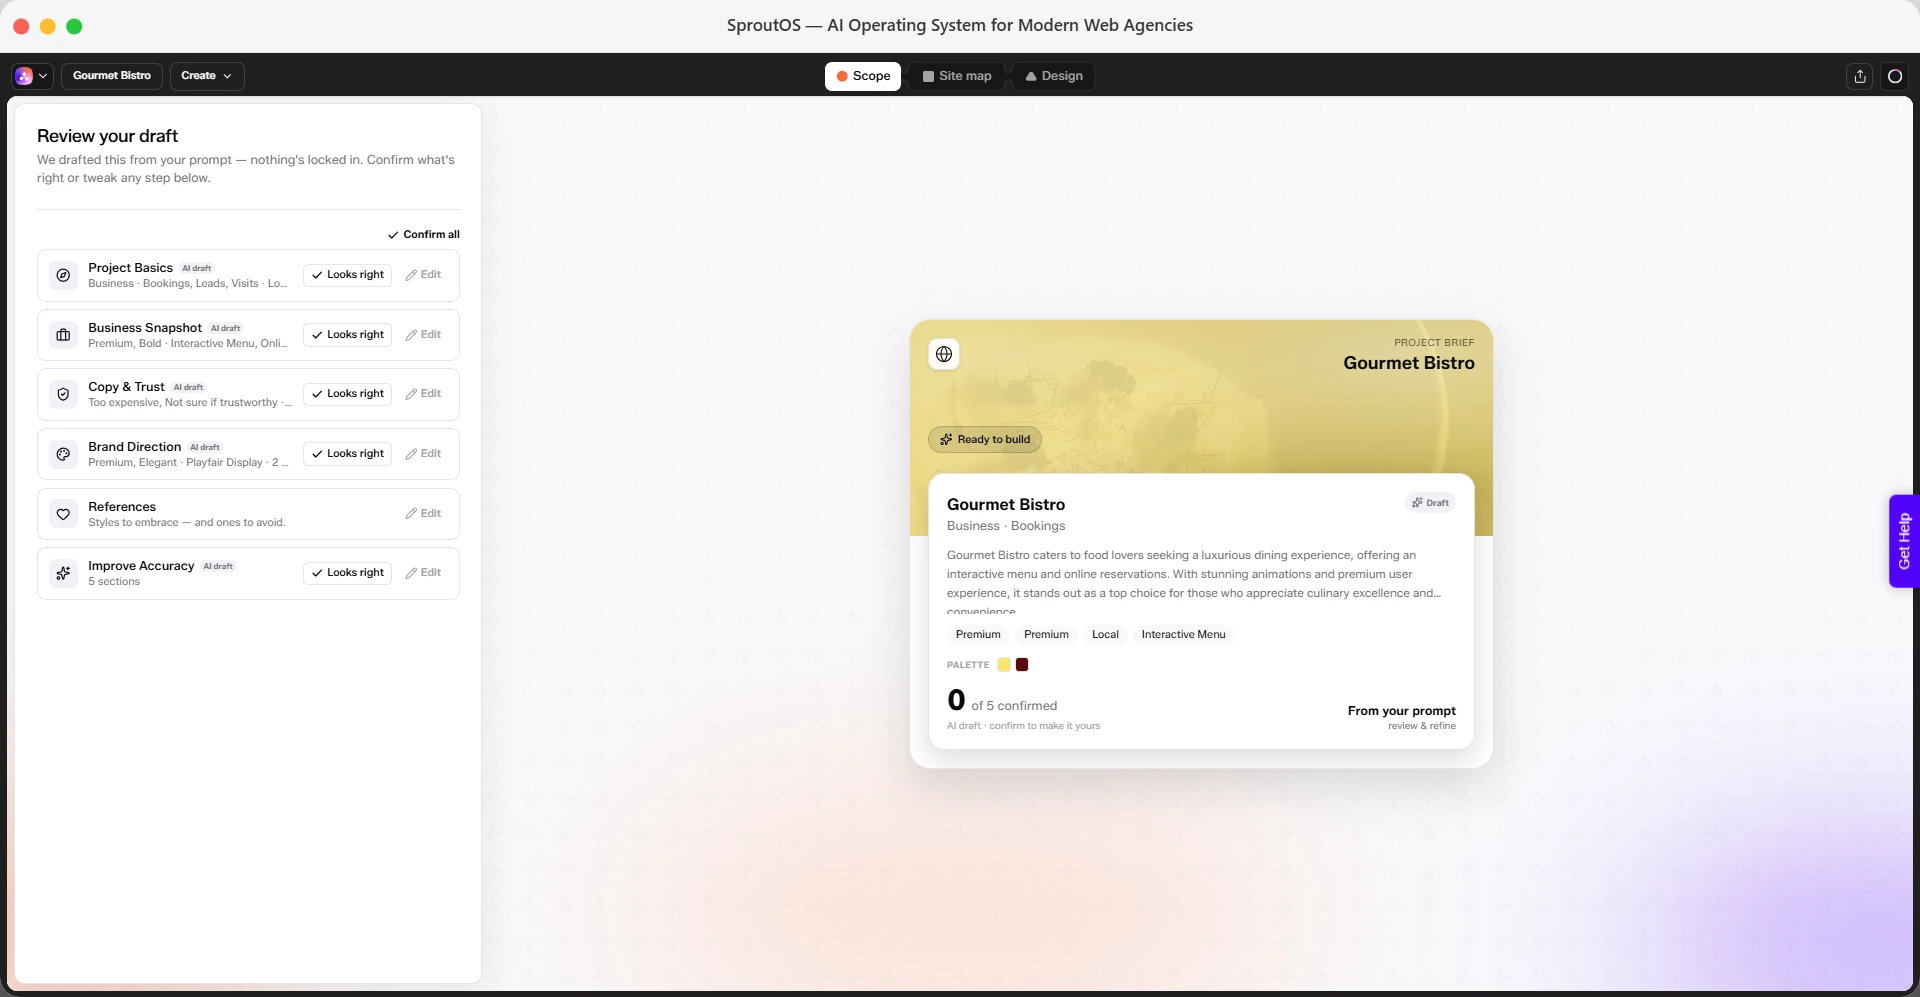
After you enter your prompt, SproutOS drafts a full project scope automatically. The Scope Editor shows this draft as a checklist of six sections:
- Project Basics - Website type, goals, and target location
- Business Snapshot - Value proposition, target customer, and tone
- Copy & Trust - Customer objections and available proof, such as testimonials
- Brand Direction - Style preference, colors, and typography
- References - Styles to embrace and ones to avoid
- Improve Accuracy - Competitor URLs and preferred sections
Five of the six sections start as an AI draft based on your prompt. References has no draft since it depends on sites you specifically want to point SproutOS to.
For each drafted section, click Looks right to confirm it as-is, or click Edit to change it.
Click Confirm all at the top of the panel to accept every AI draft section at once. But it's worth reading each section first: every answer here feeds directly into your sitemap and design later, so a quick scan now saves rework after SproutOS builds the site.
A live preview on the right shows your project brief updating in real time, including a confirmation counter (for example, "0 of 5 confirmed") so you can track your progress.
Setting Project Basics
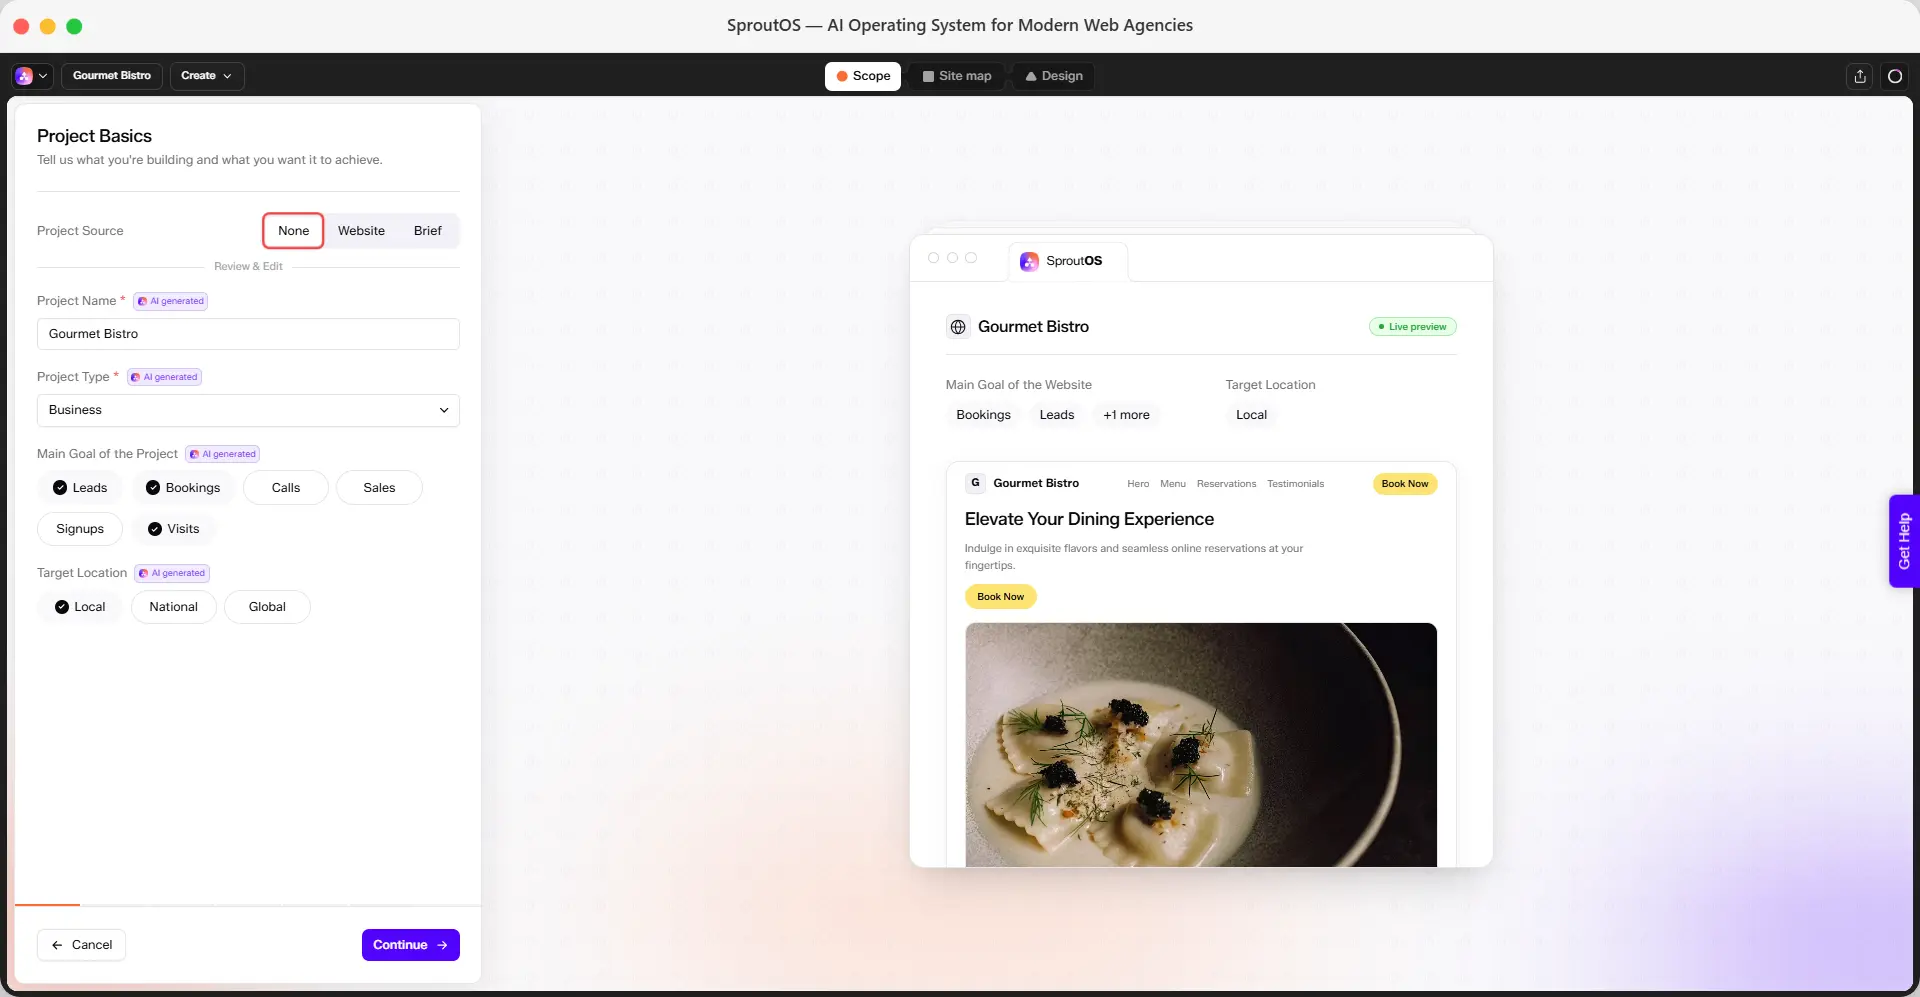
Click Edit on Project Basics to open the Project Basics panel. Choose a Project Source to determine how SproutOS fills in your project details.
SproutOS uses only your original prompt to generate the fields below. This is the default option.
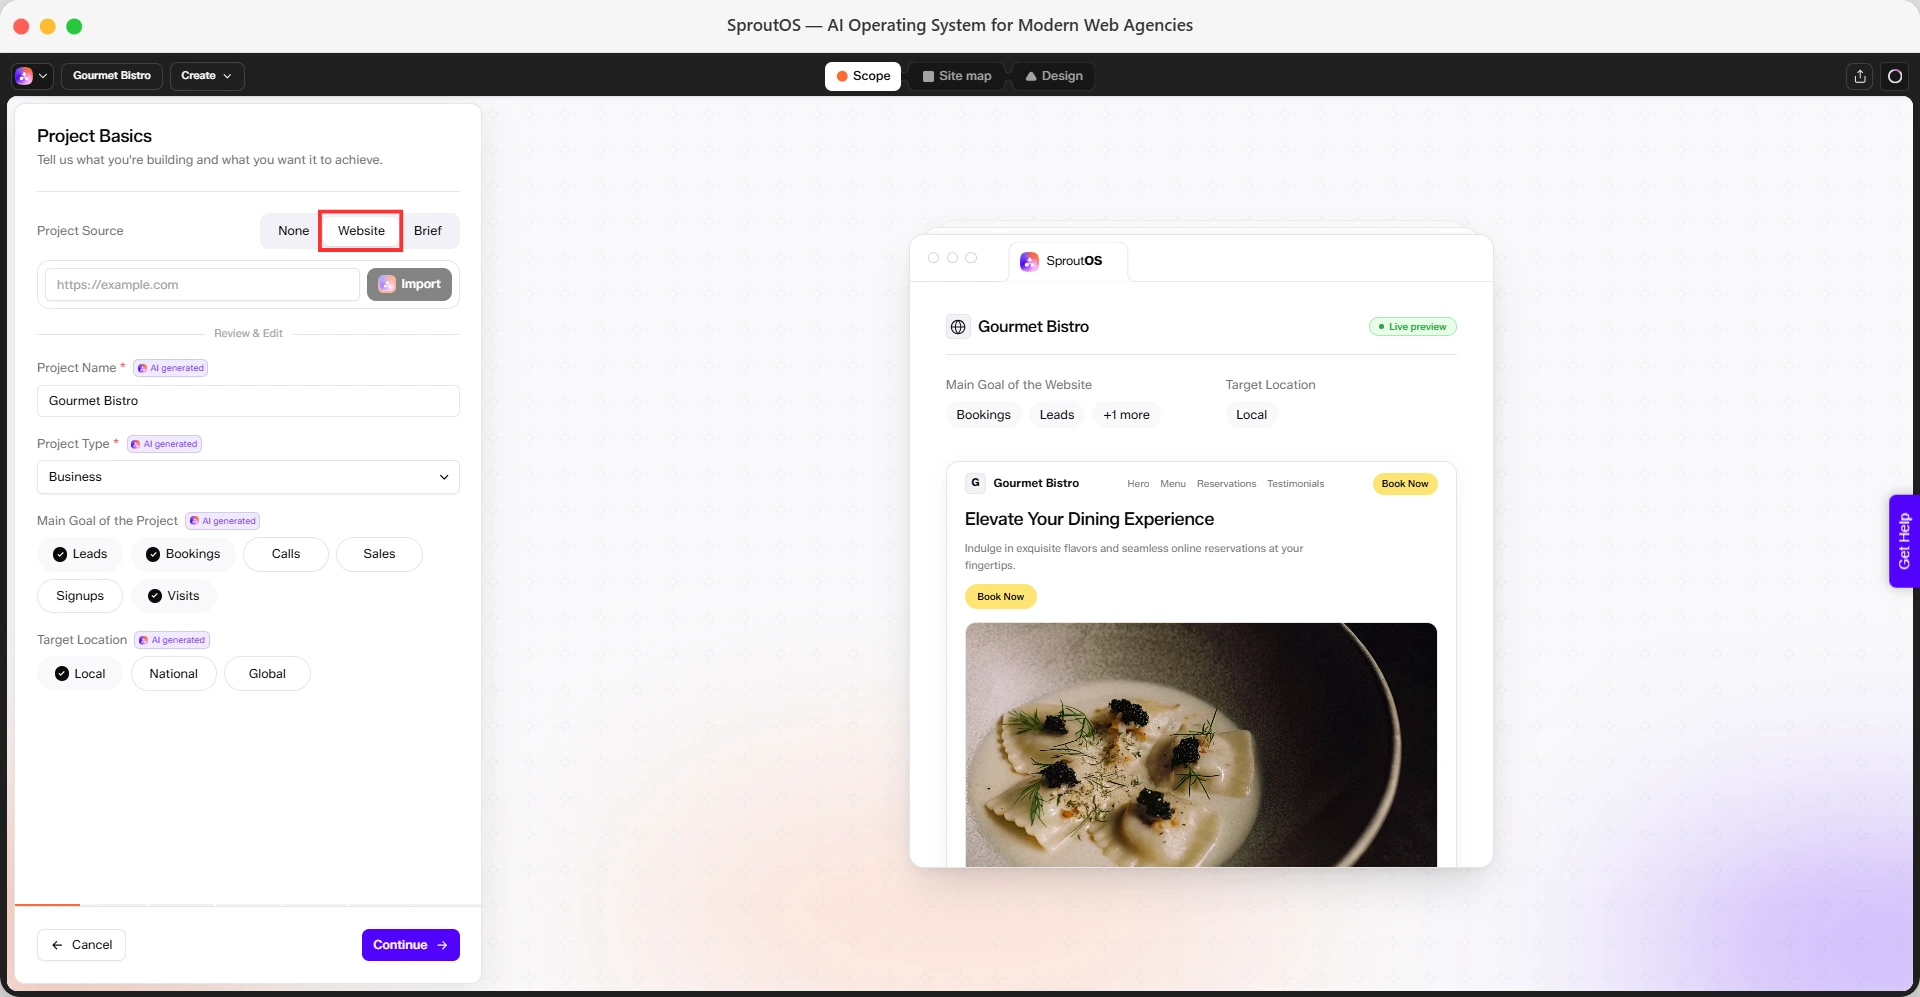
Enter an existing website URL and click Import. SproutOS crawls the site and auto-fills your fields with a From website badge.
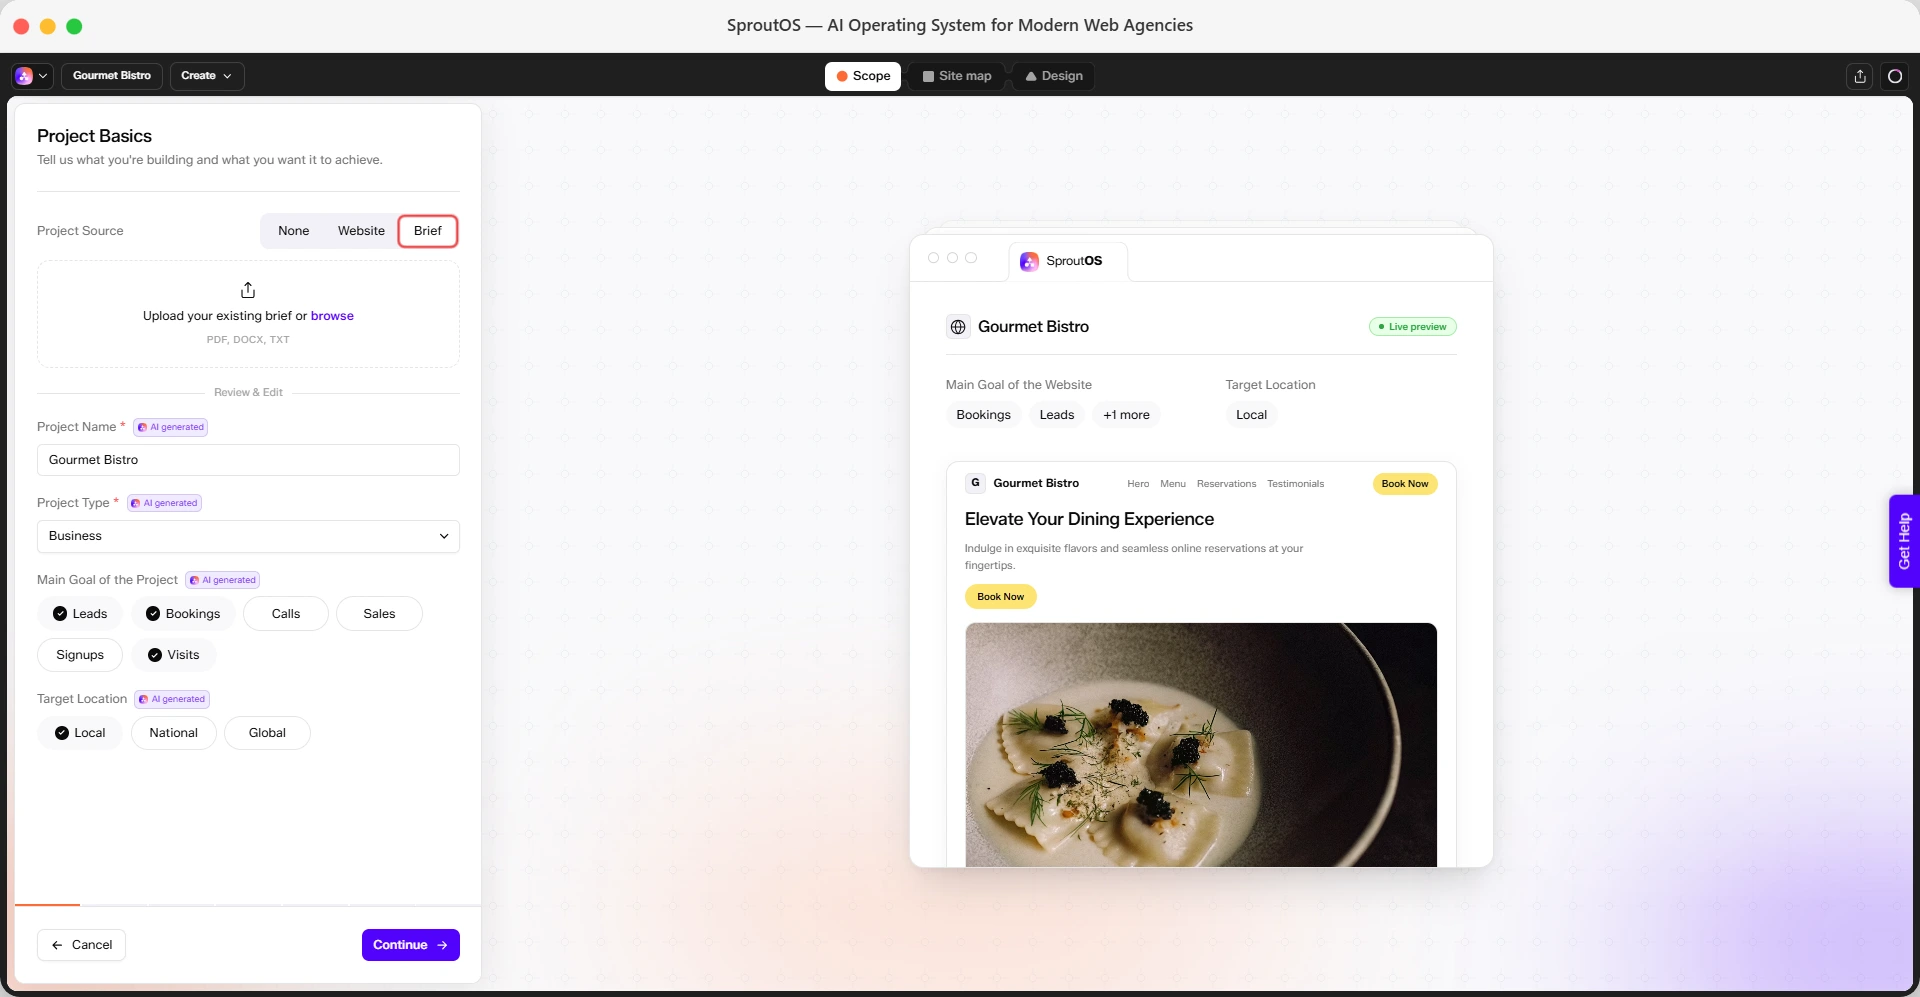
Upload an existing brief as a PDF, DOCX, or TXT file. SproutOS extracts the relevant details automatically.
Below the Project Source tabs, the Review & Edit section shows the fields SproutOS fills in:
- Project Name - The name of your website project
- Project Type - The category of website, such as Business or Portfolio
- Main Goal of the Project - Select one or more goals: Leads, Bookings, Calls, Sales, Signups, or Visits. This drives which CTAs and page priorities the AI emphasizes, so pick the goals that actually matter to your client.
- Target Location - Select one or more: Local, National, or Global. A local bakery and a national SaaS product read differently, and this setting shapes the tone and copy to match.
Each field shows a badge indicating its source: AI generated, From website, or Manual.
A live preview on the right updates as you edit, showing your project details and a rendered preview of your homepage.
When you import from a website, fields with a From website badge are auto-filled but remain fully editable. Change any value and SproutOS updates the badge to reflect your edit.
Click Continue to save your changes, or Cancel to discard them.
Defining Your Business & Audience
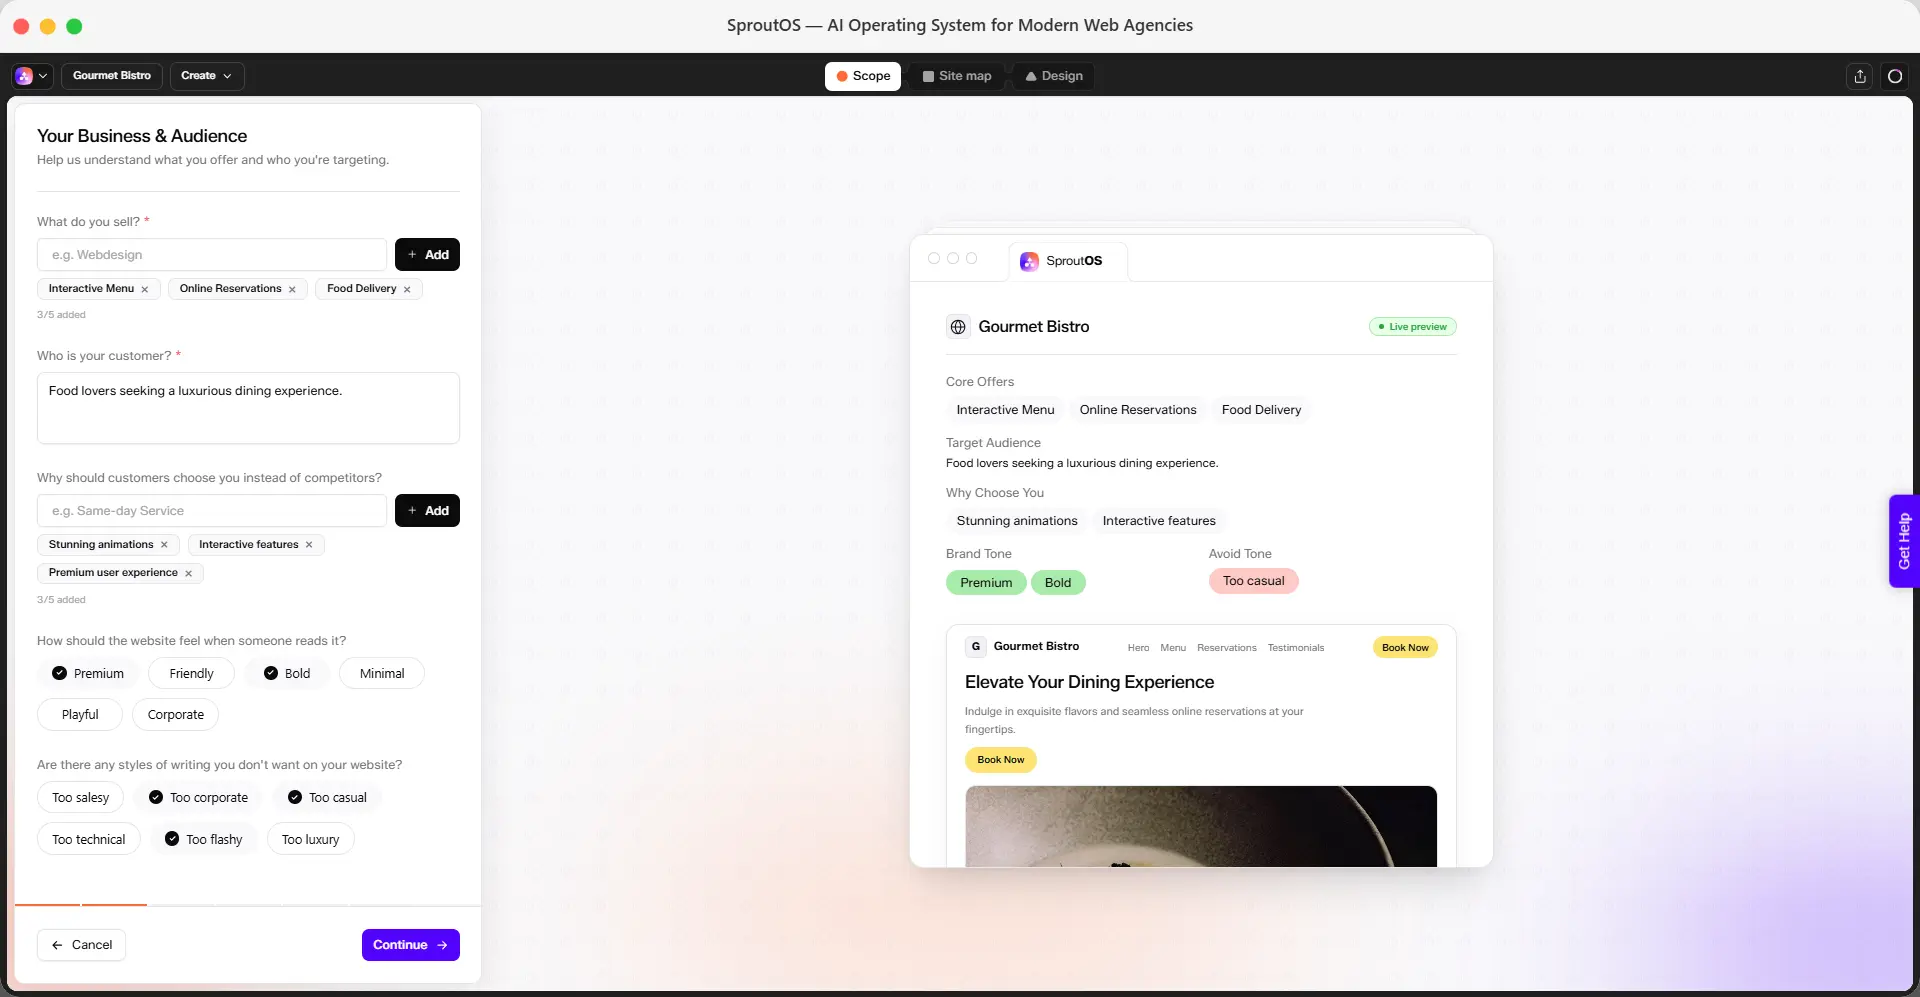
Click Edit on Business Snapshot to open the Your Business & Audience panel.
- What do you sell? - Add up to 5 products or services. Type a value and click Add.
- Who is your customer? - Describe your target customer in your own words.
- Why should customers choose you instead of competitors? - Add up to 5 differentiators. These feed directly into the on-site copy, not just internal notes.
- How should the website feel when someone reads it? - Select a tone: Premium, Friendly, Bold, Minimal, Playful, or Corporate. This changes the actual generated copy style, not just a visual label.
- Are there any styles of writing you don't want on your website? - Select any tones to avoid: Too salesy, Too corporate, Too casual, Too technical, Too flashy, or Too luxury.
This is the section that separates a tailored site from a generic one. For Who is your customer?, be specific: "busy parents booking last-minute weekend trips" gives the AI far more to work with than "people who like travel."
A live preview on the right updates as you edit, showing your core offers, target audience, differentiators, and tone.
Click Continue to save your changes, or Cancel to discard them.
Building Copy & Trust
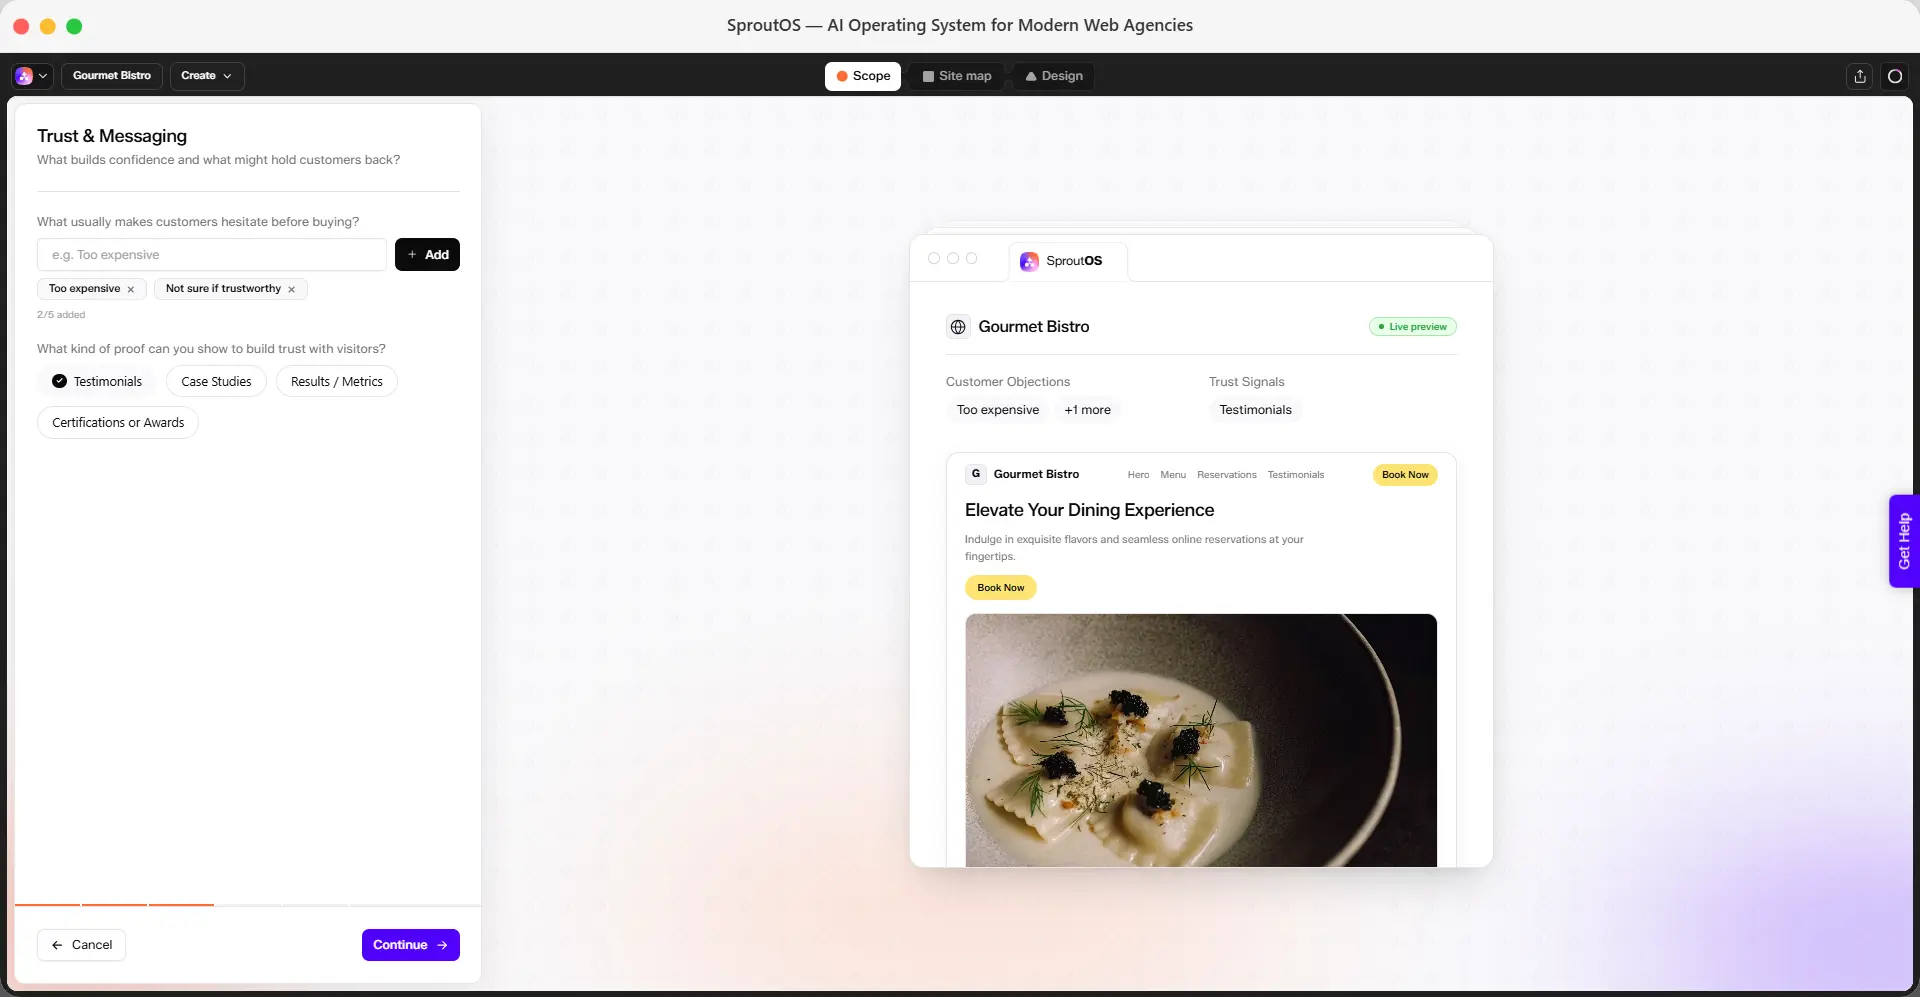
Click Edit on Copy & Trust to open the Trust & Messaging panel.
- What usually makes customers hesitate before buying? - Add up to 5 common objections. SproutOS addresses these directly in your site's FAQ and objection-handling copy.
- What kind of proof can you show to build trust with visitors? - Select the proof you have available: Testimonials, Case Studies, Results / Metrics, or Certifications or Awards. This determines which trust-building sections get emphasized in your design.
A live preview on the right updates as you edit, showing your customer objections and trust signals.
Click Continue to save your changes, or Cancel to discard them.
Choosing Brand Direction
Click Edit on Brand Direction to open the Brand Look & Feel panel.
- Design style - Select the style that best matches your brand: Minimal, Premium, Playful, Bold, Corporate, Elegant, Techy, or Organic. This picks the visual direction SproutOS designs toward.
- Brand Logo - Upload a logo as SVG, PNG, JPG, or WebP. SproutOS uses it in your site's navbar and footer. Click Replace to swap an existing logo.
- Preferred Colors - Add hex colors you want SproutOS to use in your design. These seed the actual palette, so add your client's brand colors here if they have them.
- Colors to Avoid - Add hex colors you want SproutOS to avoid.
A live preview on the right updates as you edit, showing your design style, preferred colors, and colors to avoid.
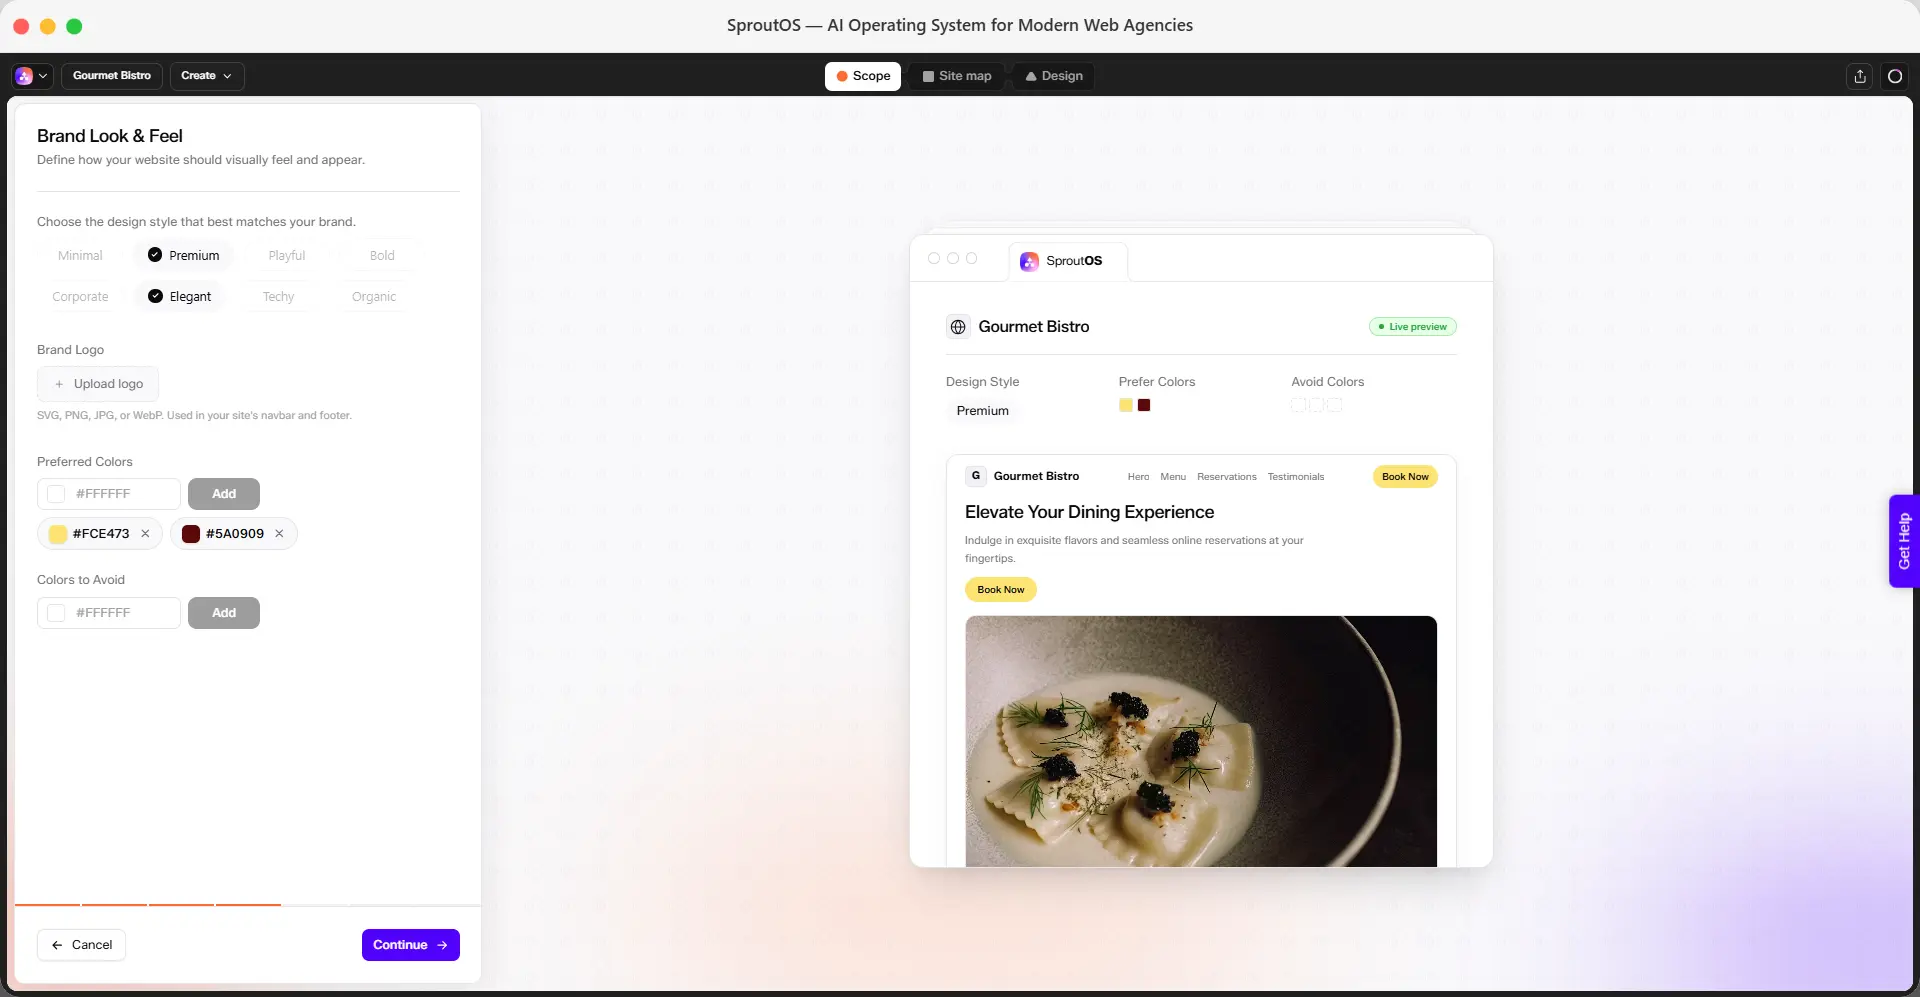
If you imported your project from an existing website, your logo and colors are pre-filled automatically. You can replace or remove any of them.
Click Continue to save your changes, or Cancel to discard them.
Adding References
Click Edit on References to open the Design Inspiration panel.
- Websites you like - Click + Add website you like. Enter the URL, select a reason (such as colors, layout, or typography), and add an optional note.
- Websites you dislike - Click + Add website you dislike. Enter the URL, select a reason, and add an optional note.
Reference sites give the AI concrete visual direction that words alone can't capture. Pick a specific reason for each one instead of leaving it vague, and don't skip the dislikes: a site you want to avoid is just as useful as one you want to emulate.
A live preview on the right updates as you edit, showing your design references and avoided styles.
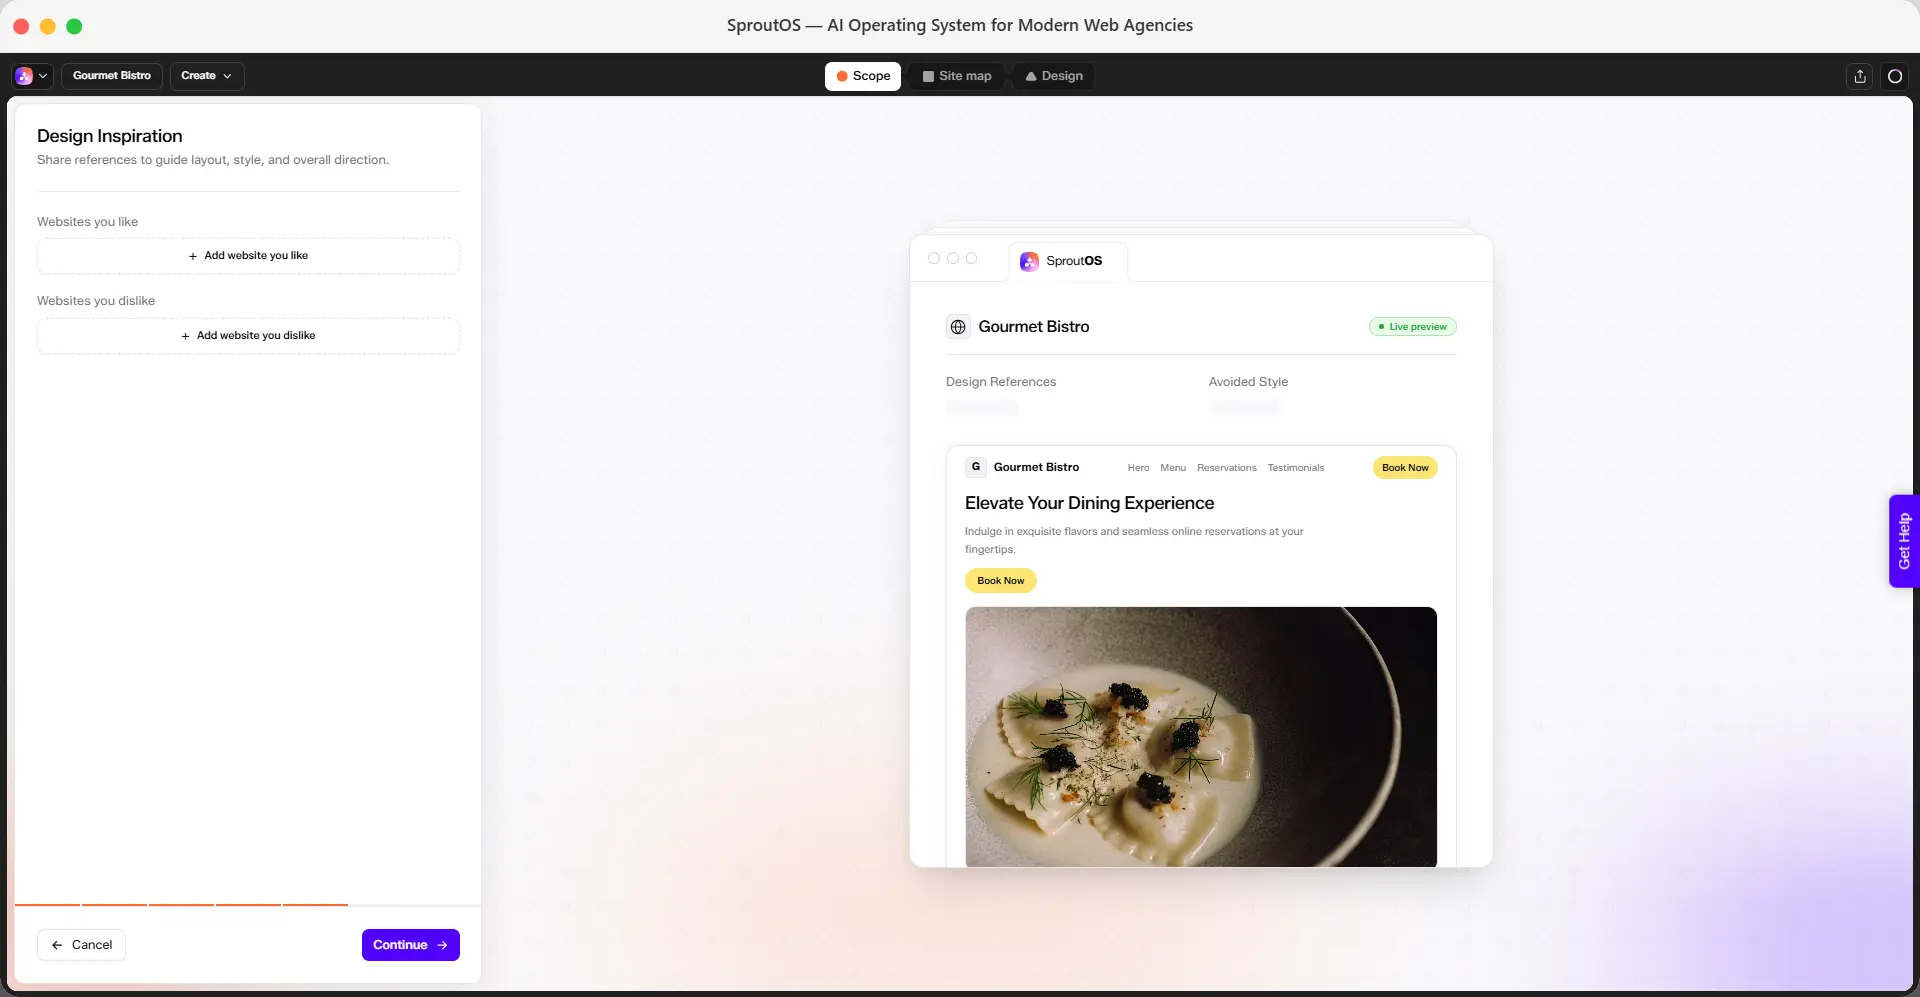
You can add multiple websites to both lists. Click Continue to save your changes, or Cancel to discard them.
Improving Accuracy
Click Edit on Improve Accuracy to open the Competitors & Structure panel.
- Competitor Websites - Add URLs of competitor sites for SproutOS to reference. This helps the AI position your client against the competition instead of copying it.
- Preferred Sections - Select the sections you want included, such as Hero, Services Grid, Pricing, Case Studies, Testimonials, FAQ, Comparison Table, Contact Section, or About / Story Section. This ensures the sitemap SproutOS generates includes the sections your client's business actually needs, instead of a generic default set.
A Ready to generate card tracks your scope's completion percentage as you fill in each section. Once it reaches 100%, you can generate your sitemap, or go back and fill in more details first.
A live preview on the right updates as you edit, showing your design references and section layout count.
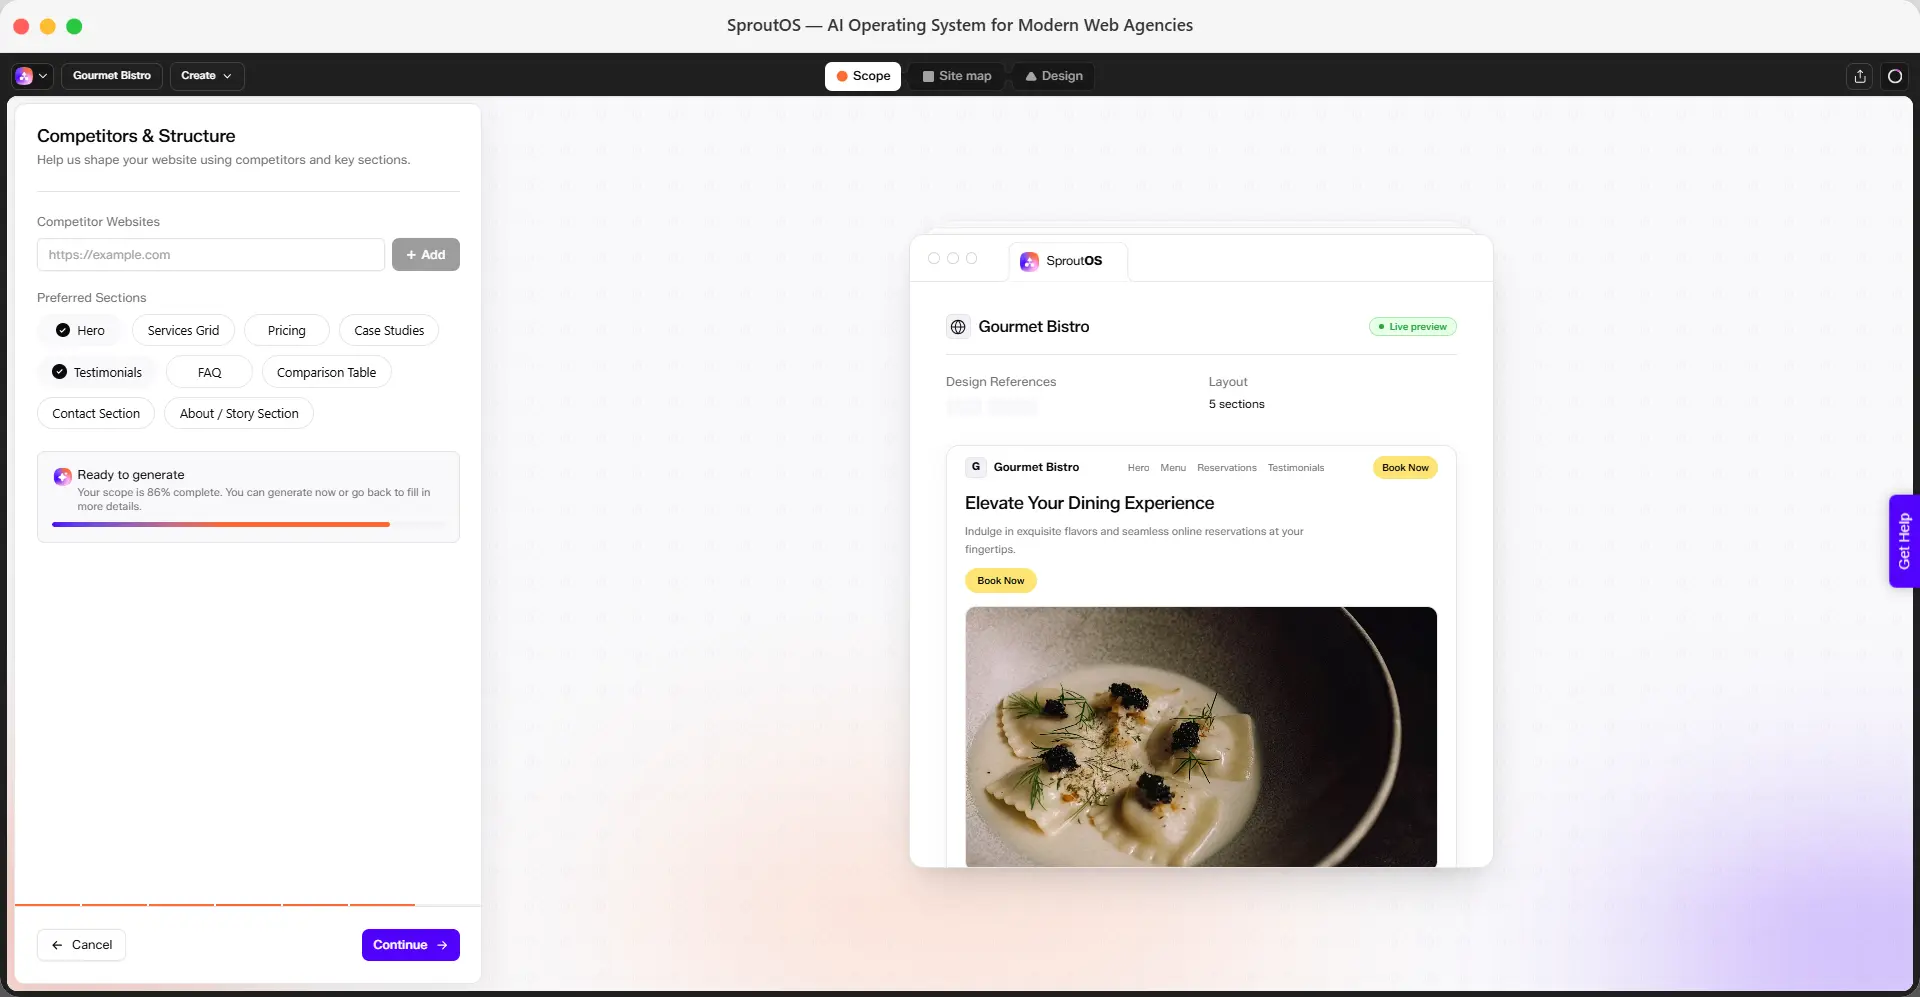
Click Continue to save your changes, or Cancel to discard them.
Saving Your Scope
Once you have reviewed or edited all six sections, return to the Review your draft panel, which now reads "Let's optimise it!". Each section shows a status badge: green Confirmed for sections you accepted as-is, or purple Manual for sections you edited yourself or that never had an AI draft.
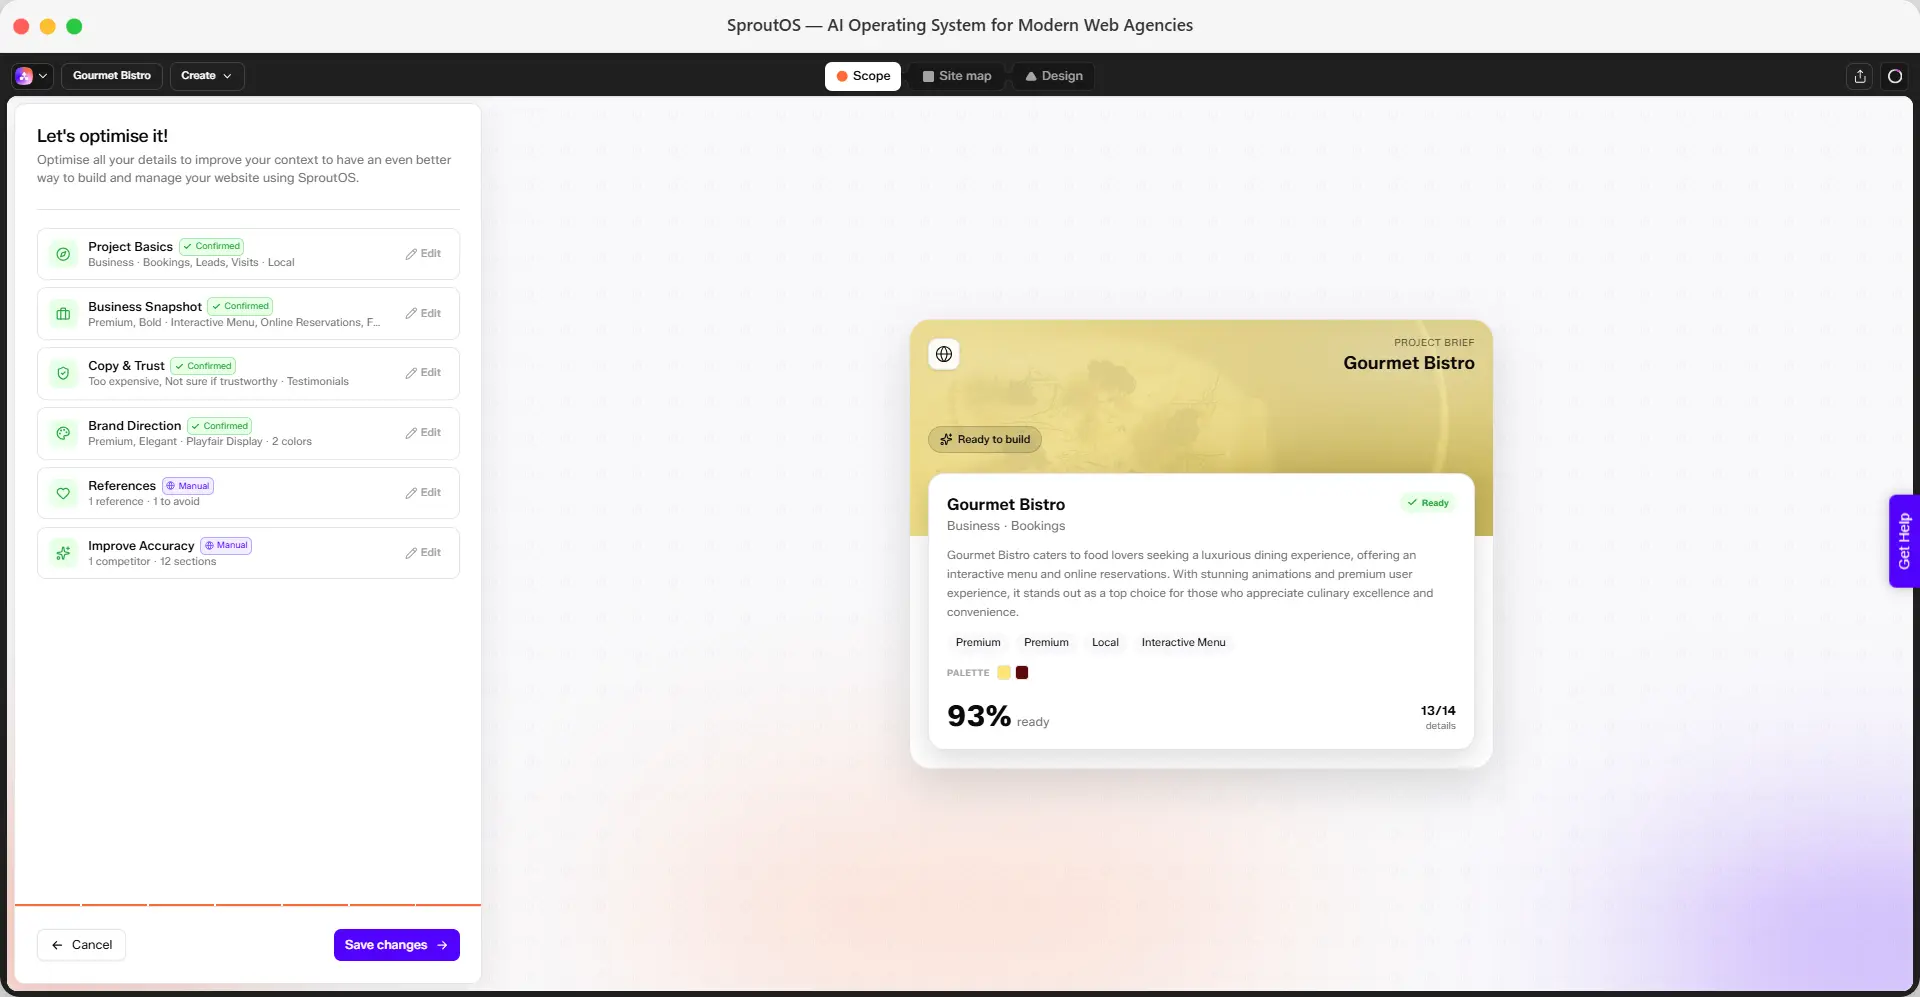
Click Save changes to finalize your scope. SproutOS redirects you to the Site map tab and generates your pages automatically, with a confirmation toast: "Scope updated."
Saving your scope isn't the last word. You can still adjust content, layout, and design later from the Sitemap and Design Editor, so don't wait for a perfect answer here before moving on.
Frequently Asked Questions
Sitemap Editor
Learn how to review and refine the pages and sections SproutOS generates from your scope.